

how to add a webcam to obs
Want to change your webcam shape? Are you bored of using the same 4:3 or 16:9 cam boxes? Ever wondered how some streamers use cool shapes for their camera — like circles, triangles or vertical rectangles? What about webcam frames with rounded corners, or cutouts and indents along the borders?
Well, it's easier than you might think — and it's all done using a filter called webcam masks, or "image masks". All you need to get started is a webcam source, plus OBS or Streamlabs OBS.
In this tutorial guide, we're going to show you:
- What are webcam masks?
- How to create masks with Photoshop (optional)
- How to use basic masks in OBS & Streamlabs
- Tips & tricks for using advanced mask designs
Don't have Photoshop? No worries. We've created a free pack of 21 webcam masks for you to download and try out on your stream.
Check out our companion video tutorial for a step-by-step guide:
What are Webcam Masks?
Webcam masks are filters within OBS and Streamlabs that allow you to hide parts of your camera source. By masking your webcam, you can choose which areas you want visible to your audience — and which you want to be "invisible". This allows you to create cool shapes and cut-outs along your camframe's borders.
For example, let's say we want our webcam to have rounded corners. We would create (or use) a mask that conceals the sharp, 90-degree corners of your webcam. Everything inside the new, curved edges will display within your webcam feed. Everything outside will be hidden.
Sound tricky? Don't worry, it's WAY easier than you may expect. We'll show you step-by-step how to create and set up your camera mask. Image masks are a super-easy trick that every streamer should master. And they come with some special benefits:
- They look amazing and will help your stream stand out from the crowd. The vast majority of broadcasters are still using the same 16:9 or 4:3 boxed webcams.
- Many professional stream overlays — like our Spartan and Community packages — require image masks. You'll need to know masking basics to use advanced webcam frames like these.
- They'll help your stream run faster! Any time you limit the scope of your webcam, you'll help save on compression bandwidth. And that means less lag and more FPS.
- Masks help to remove some of the "dead space" within a traditional webcam frame. This ensures that your viewers are focused on you — and not the wall behind you.
So how do you find image masks? Well, you can either create one of your own, or you can download one from our free pack of 21 streamer masks. If you're a DIY streamer or designer, check out the next section to learn how to make your own masks within Photoshop. If not, skip ahead to the following section to learn how to set up your mask within OBS or Streamlabs.
How to Make a Webcam Mask
Anyone with basic Photoshop skills can jump in and create webcam masks. While complex masks might take a bit more practice, the process is virtually the same no matter what shape you're making:
- Open a new project in Photoshop. If you don't have Photoshop you can download a free 7-day trial here.
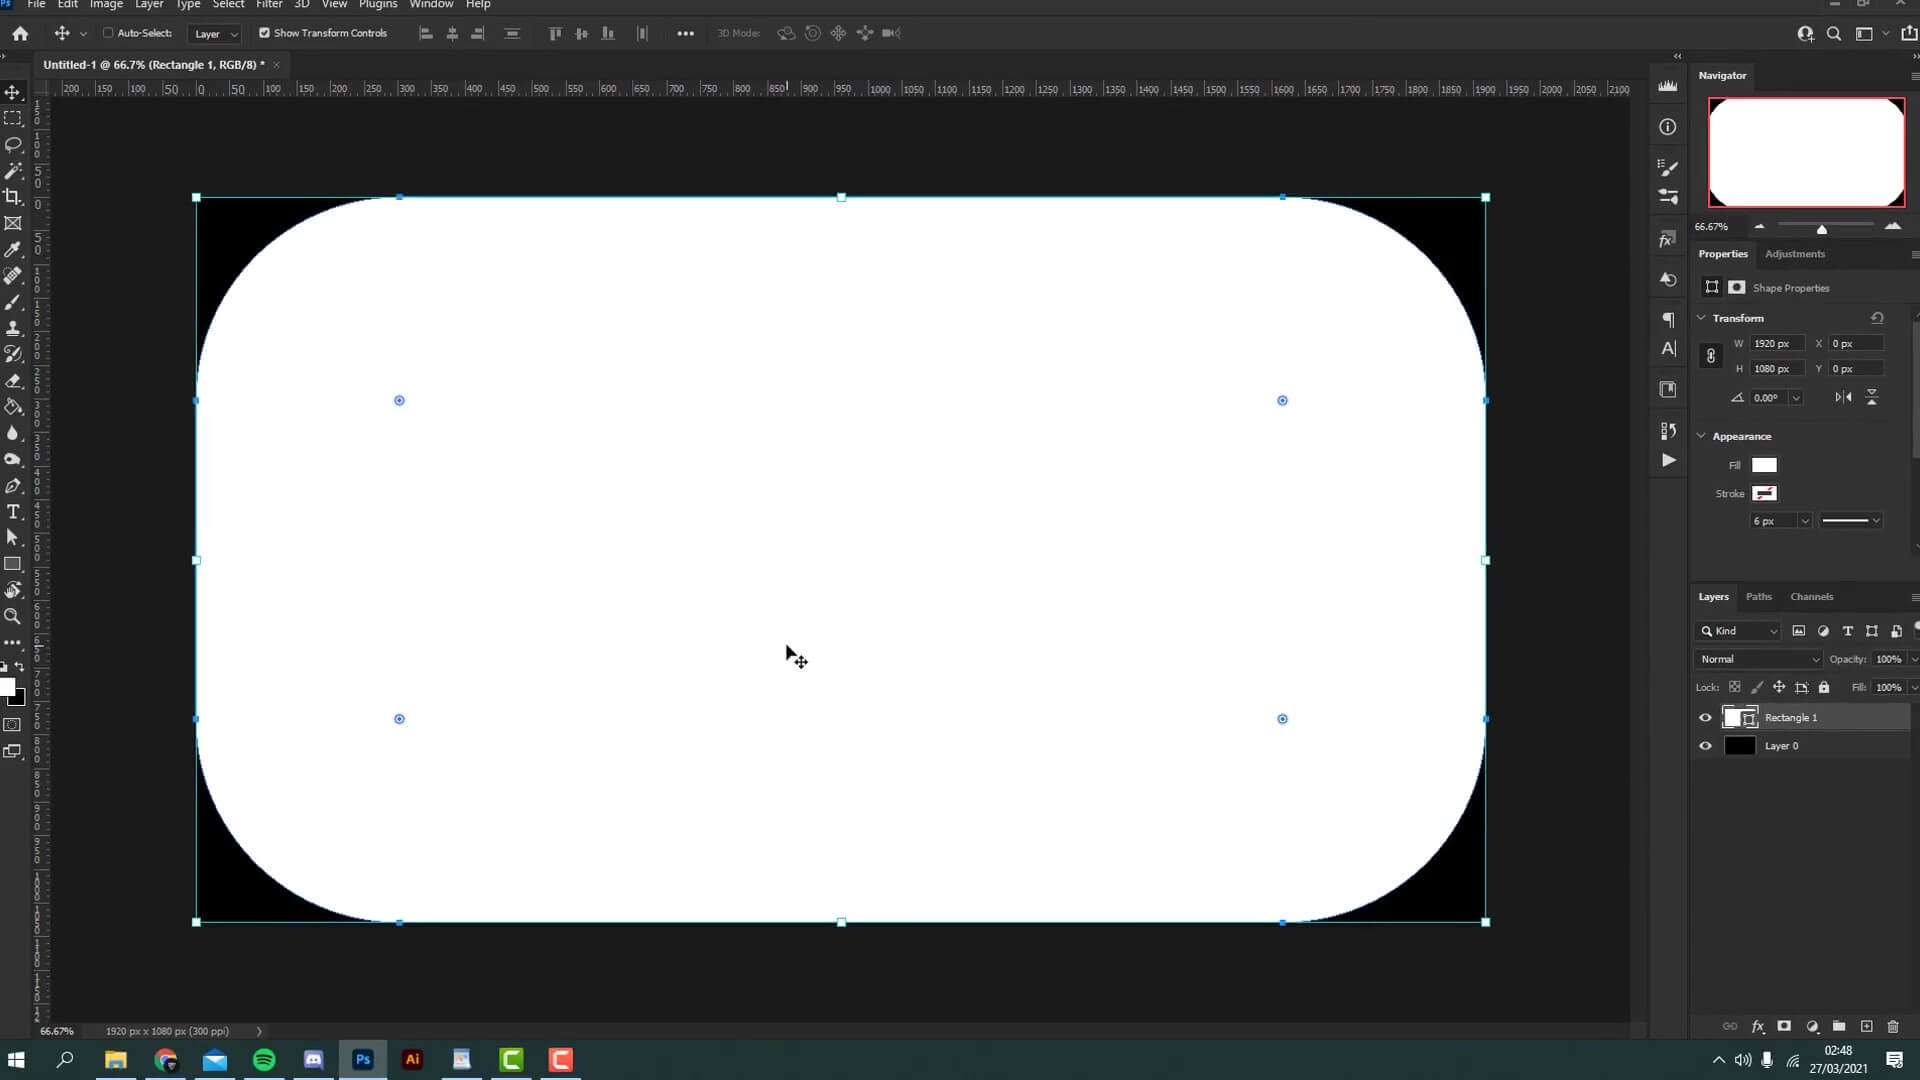
- Select your canvas. Are you using a 16:9 or 4:3 camera? Chances are, you're probably using a 16:9 webcam — in which case you'd want to use dimensions of 1920 x 1080px. If your camera is 4:3, choose a 1600 x 1200px canvas.
- Set the background fill to black. By default, any part of your webcam in this black background layer will be filtered out (i.e., made invisible) by your mask.
- Create your image mask. Add a new foreground layer and set the fill color to white. This white area represents the part of your webcam that will be visible to viewers. The layer itself can be any form you'd like; experiment with different shapes and borders until you find one you like!
- Export your mask. Once you're ready, we'd recommend saving as a JPEG or PNG — your preference.
Just remember — everything in white will be shown; everything in black will be hidden. White, visible. Black, invisible. Make sense?
Now that you've got your new image mask in hand, let's start setting it up.
Basic Webcam Mask Setup
It's easy to set up your webcam mask in Streamlabs or OBS. In fact, the process is nearly the same across both software — aside from a few small UI differences.
We'll start with Streamlabs, and then show you where things might be different on OBS Studio.
Setting Up Webcam Masks in Streamlabs (Basic)
Here's what setup looks like on Streamlabs OBS:
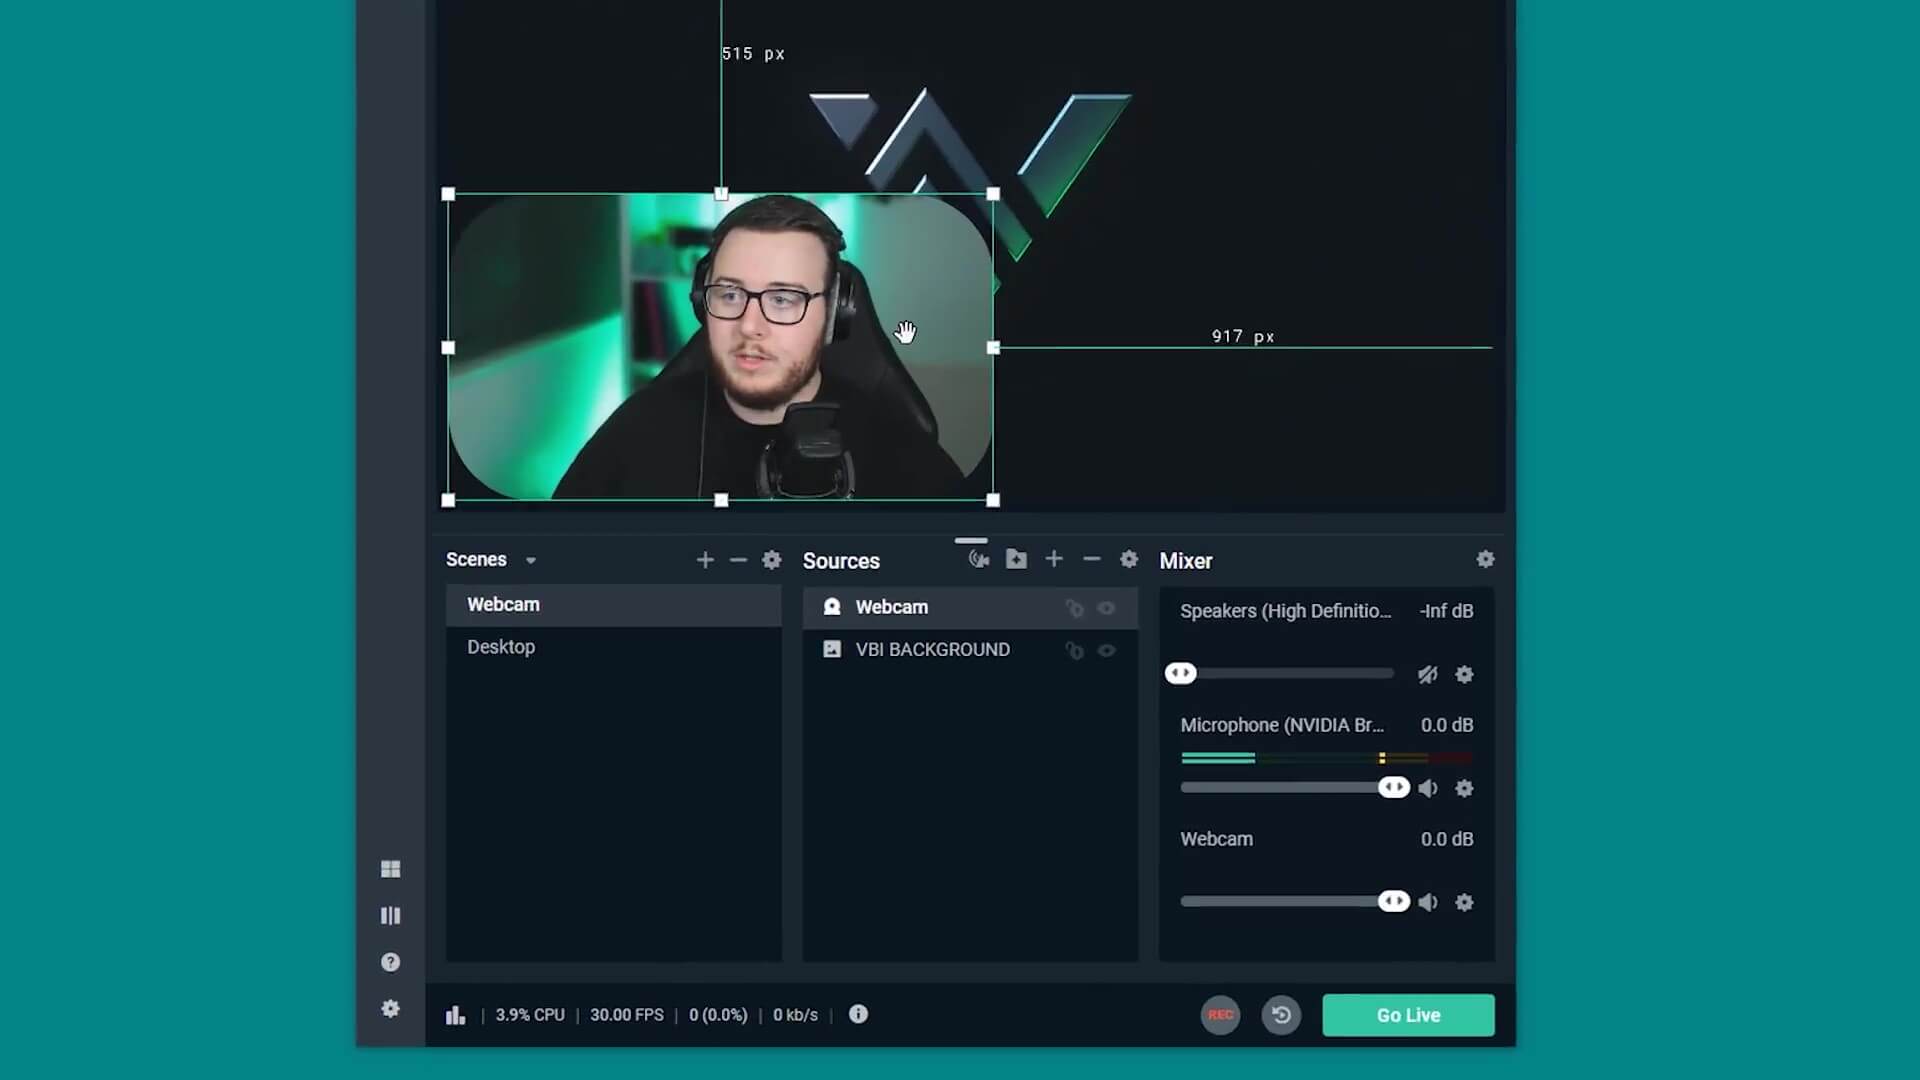
- Add your webcam source, if you haven't already. Go to the "Sources" tab, press the "+" icon, then select "Video Capture Device". Name it something recognizable (like "Webcam"), then select your camera device from the dropdown menu.
- Add a webcam filter. Under the "Sources" tab, right-click your new webcam source. From the menu select "Filters", then click "+" in the next window to add a new filter. By default, the Filter Type should be set to "Image Mask/Blend" — so just click "Done".
- Add your webcam mask. In the next window, click "Browse" next to the "Path" field, then navigate to your new image mask to open it. If you picked the right canvas size in Photoshop, your mask should fit nicely over your webcam source. Click done.
- Optimize your camera layout. Now that your mask has been applied, you'll be able to resize and reposition your webcam without affecting the image mask. When scaling down, always hold the CTRL key and drag inwards from the corner — so that your webcam retains its original aspect ratio.
It's as simple as that! We'll show you some advanced tips & tricks shortly, but first let's cover OBS.
Setting Up Webcam Masks in OBS (Basic)
Webcam masks in OBS and StreamElements (OBS.Live) are nearly identical, with a few small differences:
- Add your webcam source by locating your "Sources" tab and clicking the "+" icon. From the menu, select "Video Capture Device", then name your webcam source. From the device dropdown menu, select your camera and click OK.
- Add a webcam filter by right-clicking on your new camera source, then selecting "Filters" from the menu. In the next window you'll see OBS has two different filter types: "Audio Filters" and "Effect Filters". Click the "+" button under "Effect Filters", select "Image Mask/Blend" and give your new filter a quick name.
- Add your webcam mask by selecting the "Browse" button next to the "Path" field. Navigate to your new image mask and open it. The mask should automatically appear as an overlay over your webcam. If it doesn't fit correctly, go back into Photoshop and make sure you're using the right image dimensions.
- Optimize your camera to fit your unique stream layout. Resize your webcam by holding the CTRL key and dragging the corner inwards. Reposition as needed by clicking and dragging. Your mask should remain unchanged, despite the transformations.
And there you have it! Once you've mastered these steps, you'll be able to use most basic webcam masks — including the 21 free masks we're going to give you later!
Advanced Webcam Mask Setup
For many streamers, a basic understanding of webcam masks is enough to get by. However, if you're using professional stream overlays — like our Kraken or Primatic packages — you'll need to go a bit further. Complex mask designs like these take a few additional steps. Don't worry, installation only takes a few minutes and we supply you with everything you'll need.

Among the tips and tricks, we'll teach you how to add a frame to your webcam mask — one of the most common and important tasks for a streamer. We'll also show you how to create a webcam scene, which will house all your webcam elements and apply them across multiple scenes at once.
Setting Up Webcam Masks in Streamlabs (Advanced)
Once again, we'll start out with Streamlabs OBS:
- Create a new scene by clicking the "+" button in the "Scenes" tab. We recommend naming it "Webcam Scene", or something similar.
- With your webcam scene selected, add your camera source by clicking the "+" button under the "Sources" tab and selecting "Video Capture Device". Name it "Webcam", select your device and click OK.
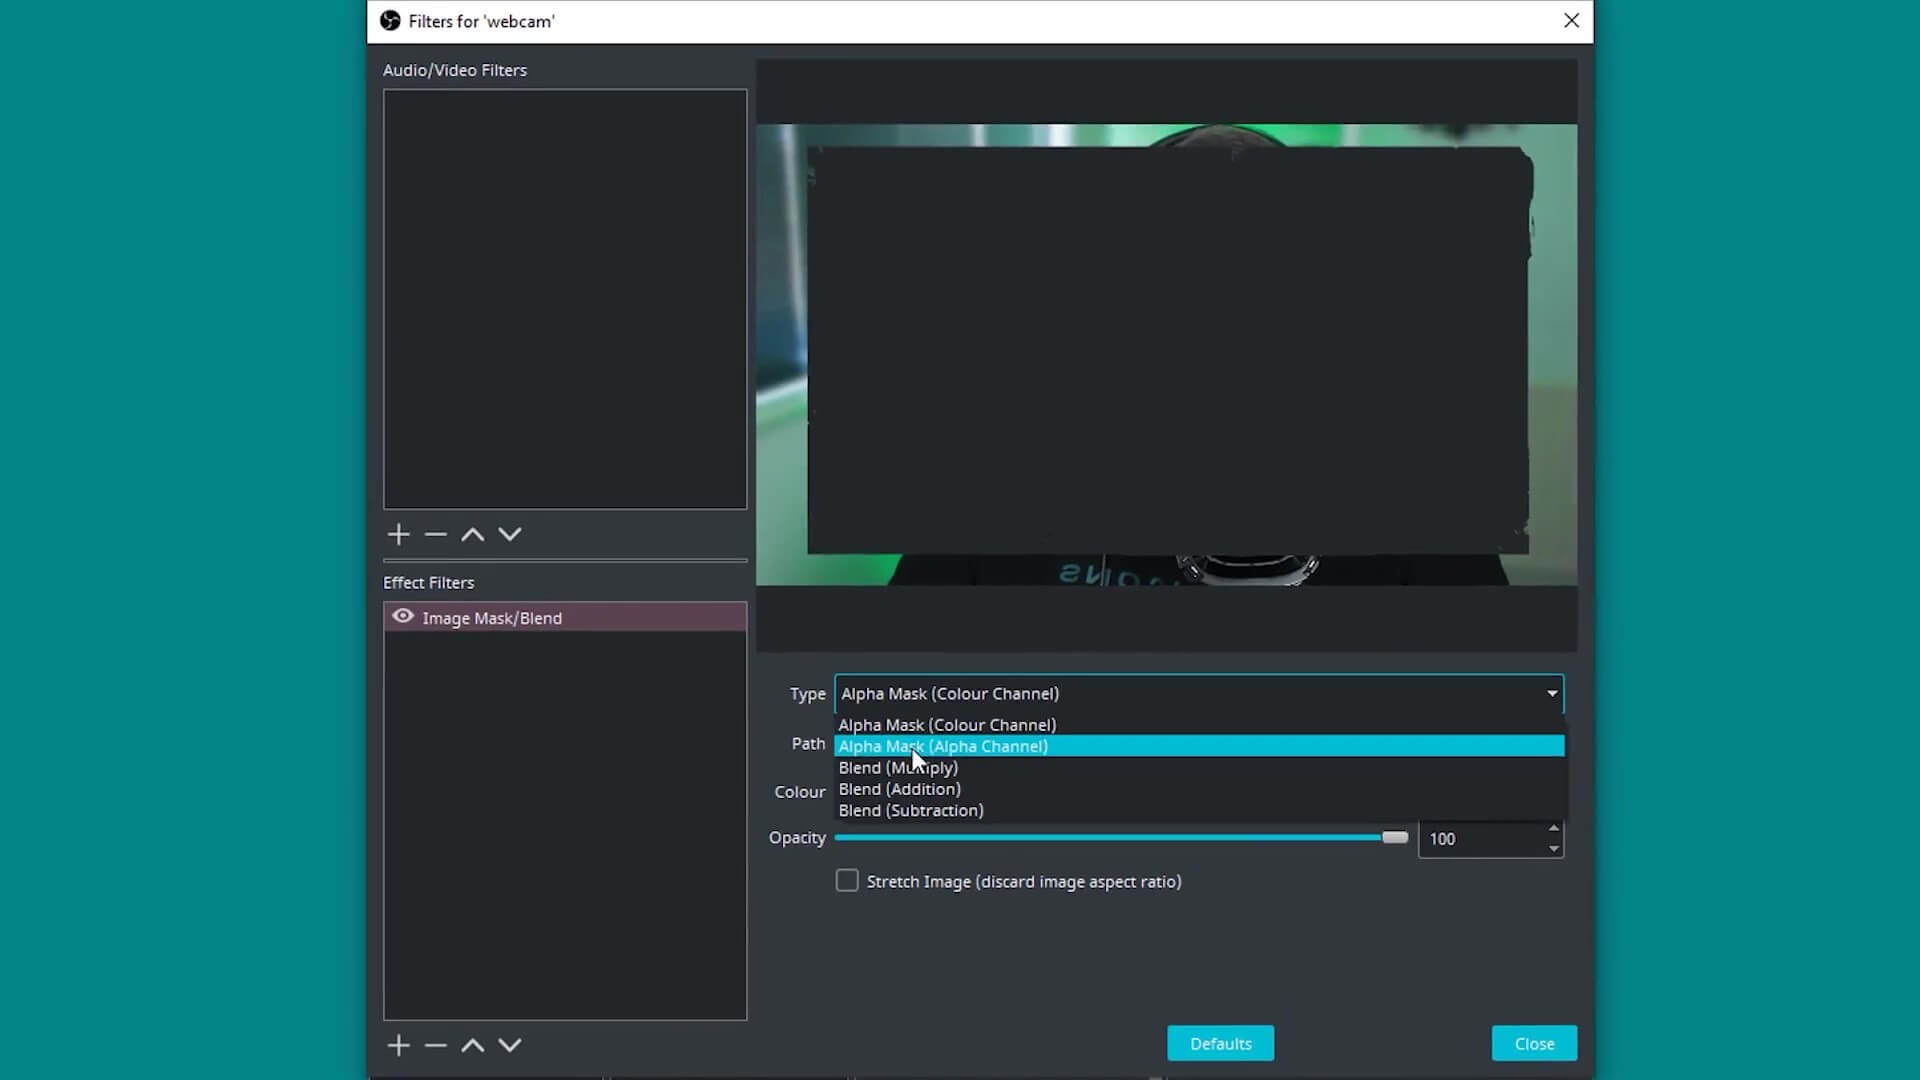
- Add your image mask by right-clicking the new webcam source, selecting "Filters", then choosing "Image Mask/Blend". Click "Browse" next to the path field, then locate and open your webcam mask. Next, click the dropdown menu next to "Type" — make sure "Alpha Mask (Alpha Channel)" is selected. Once done, close the window and return to the Streamlabs dashboard.
- While your webcam scene is still selected, add a webcam frame by creating a new source. Select "Image" and name it "Webcam Frame". Next, open your webcam frame file, which should be in the same location as your mask. Your webcam frame should appear in the scene preview.
- Now you'll want to optimize your webcam frame, since it will not initially fit the full size of your canvas. To enlarge it, simple right-click the frame, select "Transform" and choose "Fit to Screen". Your webcam frame should now be aligned with your camera and mask. Once done, all your webcam elements should be successfully combined into a single scene.
- At this point, you may want to use your webcam scene as a source within other scenes — like your intermission or gameplay scene. To do this, select your destination scene under the "Scenes" tab, then press "+" in the "Sources" tab. In the next window, select "Scene" then choose your new "Webcam Scene". Resize your camera (hold CTRL and drag in from the corner) and reposition to fit your unique layout.
Now your camera, image mask and webcam frame can all be used in any scene you'd like! Neat huh?
Setting Up Webcam Masks in OBS (Advanced)
There are a few small differences for OBS Studio, but overall the process is quite similar:
- To create a new scene, click the "+" button in the Scenes tab. Name it "Webcam Scene" for easy identification, then make sure to click it so it's selected.
- Add your camera source by clicking the "+" button in the Sources tab. Select "Video Capture Device" and name it "Webcam".
- Now, add your image mask. Right-click the webcam source and select "Filters" from the dropdown. In the next window, click the "+" button underneath the "Effects Filters" tab, then select "Image Mask/Blend". Click "Browse" next to the Path field to select and open your mask file. Next, make sure "Alpha Mask (Alpha Channel)" is selected in the "Type" dropdown. Once ready, close the window and return to the OBS dashboard.
- To add a frame for your webcam, make sure your Webcam Scene is still selected, then click "+" in the Sources tab and choose "Image". Now locate and open your webcam frame files, likely in the same folder as your mask.
- Readjust your webcam frame by right-clicking it, selecting "Transform" from the dropdown menu, and clicking "Fit to Screen". Now all your webcam elements have been combined into a single scene.
- Want to add your new webcam to other scenes? Simply select the scene you want to add it to, then press "+" in the Sources tab. From the dropdown, select "Scene" then choose your Webcam Scene. From here you can scale your webcam down and reposition it as much as you'd like.
Get Free Webcam Masks & Frames
Need some webcam masks for your stream? We've created a free mask kit, which includes:
- 21 webcam masks
- 21 webcam frames
Each kit includes TONS of unique webcam shapes and borders — and we're taking requests too! Want to see a new shape included in the kit? Drop us a line and we'll get it added!
Your kit also includes 21 optional webcam frames, which you can customize with your unique colors. To add your frame and adjust color, follow these steps:
- Add a webcam frame source: Select your webcam scene within Streamlabs or OBS. Click "+" under the Sources tab, select "Image" and name it "Webcam Frame". Click "Browse", then locate the folder where you saved your webcam frames.
- Open your webcam frame: Pick the frame that matches the webcam mask you are using. For example, if you already applied the "Hexagon" image mask to your webcam, select the "Hexagon" frame. This will ensure your mask and frame align correctly. Click done.
- Add a color correction filter: Back in your Sources tab, right-click your new webcam frame source, then select "Filters" from the dropdown. In the next window, click the "+" icon, then select "Color Correction" from the "Filter Type" menu.
- Change your frame color: In this new window, locate the "Hue Shift" slider. Adjust the selector up and down until you find the right color match. You can ignore the other slider options for now. When ready, click "Done".
Pretty easy, huh? Keep experimenting until you find the perfect mask + frame combination for your stream.
Wrapping Up
Adding webcam masks is a fun and simple way to make your stream stand out. Now that you've mastered the basics — plus some advanced tips & tricks — you're ready to take things to the next level.
We expect webcam masks to become more and more popular in the years to come. Broadcasters are getting more creative, experimenting with new, out-of-the-box stream layouts. Meanwhile, graphics providers (like us) are incorporating more unique webcam options into their designs. Before long, tens — if not hundreds — of thousands of creators will be using masks on-stream.
Luckily, by reading this you've got a head-start on the competition. Keep practicing and you'll be miles ahead of the others. In the meantime, share your mask creations with us by tagging us @VBI on Twitter.
how to add a webcam to obs
Source: https://visualsbyimpulse.com/webcam-masks-guide-obs-streamlabs/
Posted by: martinezpres1938.blogspot.com
0 Response to "how to add a webcam to obs"
Post a Comment